Step 2: Create a Publishing Job
Hand-building the same publication every release is where the hours go. A publishing job captures it once: a Stationery (the design) plus the documents it publishes.
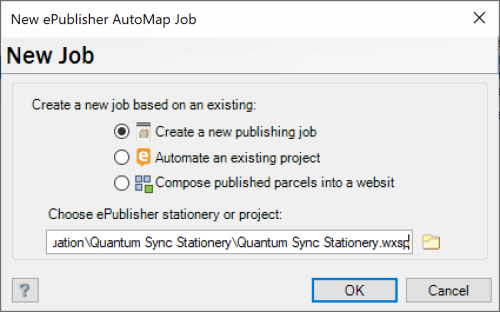
Choose File > New Job. In New ePublisher AutoMap Job, choose Create a new publishing job; under Choose ePublisher stationery or project: browse to
Documents\WebWorks ePublisher AutoMap\Evaluation\Quantum Sync Stationery\Quantum Sync Stationery.wxsp; click OK.On Job Info, set Job name: to My Quantum Sync Help. Click Next.
On Documents, click New Group and name it Help; click Add Document and add
Documents\WebWorks ePublisher AutoMap\Evaluation\Quantum Sync Source Docs\quantum-sync.md. Click Next.On Target Selection, leave Build checked for Web Help and clear it for PDF. The Stationery carries both; one is enough for now (leaving PDF on is harmless, only slower). Click Next.
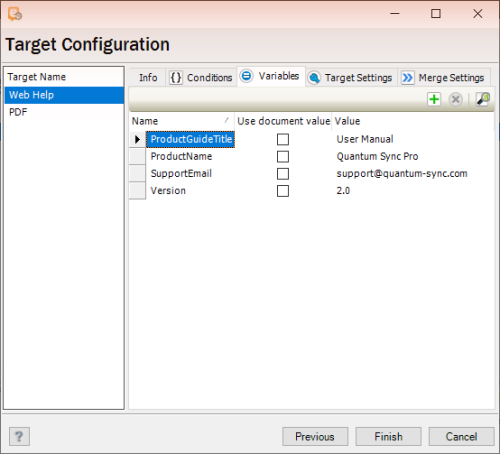
On Target Configuration, Web Help is selected in the target list and the Info tab is showing. Under Deployment, click Deploy Destinations..., then Add > Folder. Set Name: to My Quantum Sync Help and Directory: to
Documents\WebWorks ePublisher AutoMap\Output\My Quantum Sync Help; click OK, then OK again.Pick My Quantum Sync Help under Deploy to:. AutoMap will not let you leave the Info tab until a built target has a destination; the message reads "Please select an output location."
Select the Variables tab; double-click the value of
ProductNameand change it from Quantum Sync to Quantum Sync Pro. The override belongs to this job and this target; the Stationery is untouched. Click Finish. When the scheduled-task properties open, click OK.Choose Job > Run, then Job > Preview Output in Browser > Web Help. The site now says Quantum Sync Pro.
Conditions and Target Settings on the same page override the Stationery per target the same way.