Defining the Table of Contents Structure (Levels)
By default, ePublisher attempts to automatically determine your source content’s TOC levels. You can manually adjust those levels if the settings do not meet your requirements.
To define the table of contents structure (levels)
1. Open your Stationery design project.
2. On the View menu, click Style Designer.
3. On the Project menu, click a target in the Active Target menu option that is an output format that supports this option.
4. In Paragraph Styles, select the style you want to include in your TOC.
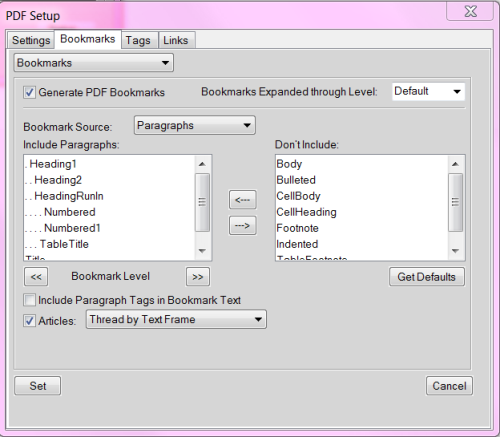
5. On the Options tab, specify a value for the Table of contents level option. The default value, Auto-Detect, attempts to infer the necessary information based on your source content. Specify a value that indicates the level of the table of contents entry for the selected paragraph style. When working with Adobe FrameMaker, you can determine the levels by examining the PDF Bookmark levels for paragraphs that appear in the table of contents. Here is an example of the Bookmarks tab from FrameMaker 11, to navigate here, you would select File > Print.... Then click the PDF Setup... button. 

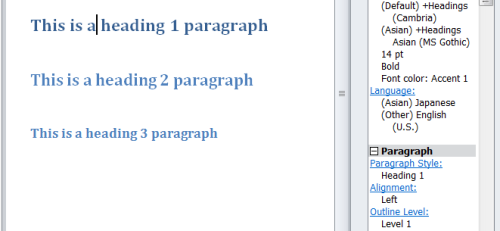
When working with Microsoft Word sources, the auto-detect values are based on the Outline level of each paragraph style. Below is a screenshot of the Word 2010 interface for each paragraph’s outline level, to navigate here, you use the key combination Shift + F1.

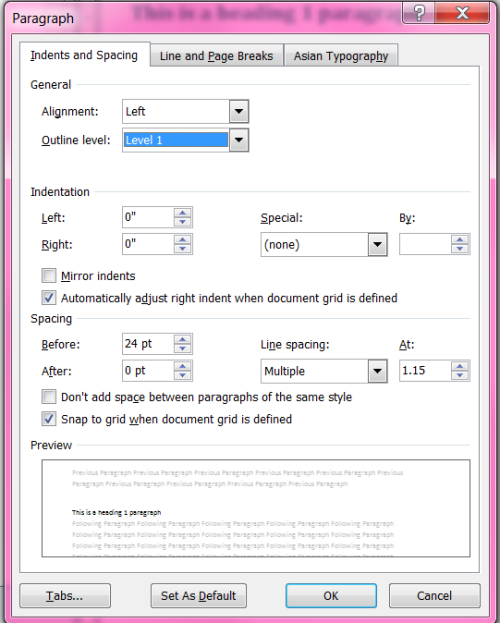
Once you click the Outline Level hyperlink, you can select the desired level from the following window.

DITA XML auto-toc is taken from the map hierarchy. A good example would be from the sample input provided in the Exp_Design project located in the ePublisher directory in the Documents library, or by the
[program files]\WebWorks\ePublisher\[version]\Helpers\dita-ot\samplesLast modified date: 12/27/2024