Specifying Table of Contents Settings
ePublisher allows you to specify whether you want to generate a table of contents, the file name you want to specify for your table of contents file, and how you want your table of contents to display in your generated output.
ePublisher provides table of contents settings to help you address how you want your table of contents to display. By default, ePublisher uses the table of contents levels specified in the project or in the Stationery file to create a table of contents for your help system based on the heading levels in your source documents. However, if you have source documents where writers skipped heading levels, you can specify how you want ePublisher to display skipped headings in the table of contents.
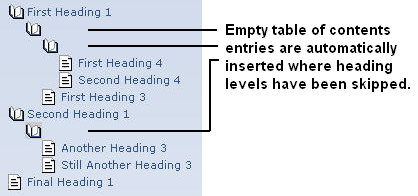
For example, assume that you have an ePublisher project that uses a Stationery file that specifies Heading 1, Heading 2, and Heading 3 as levels in the output table of contents. Then assume that in the source document, you skipped several Heading 2 levels. ePublisher displays an empty table of contents icon, similar to the following figure, in the location of the skipped Heading 2 levels unless you specify how you want to manage skipped heading levels in the generated table of contents.
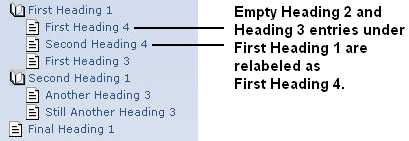
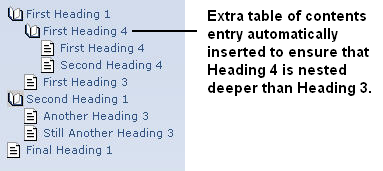
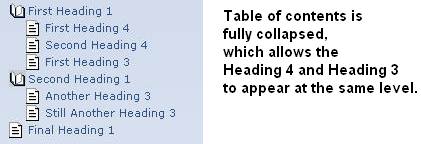
You can specify the following behavior for table of contents where writers skipped headings:


To specify table of contents settings for a target
1. On the Project menu, select the target next to Active Target for which you want to specify settings.
2. On the Target menu, click Target Settings. You must have target modification permissions to modify target settings. For more information, see Working with Target Settings.
3. Under Table of contents, specify the appropriate values for the table of contents settings. For more information about table of contents settings and values, click Help.
4. Click OK.
Last modified date: 01/27/2022